 |
|
Audio Intelligent Vinyl Solutions products are engineered and manufactured in the USA. |
Record Cleaning Machine Museum
Audiophile Mark D’Ambrosio gives us the How-To.
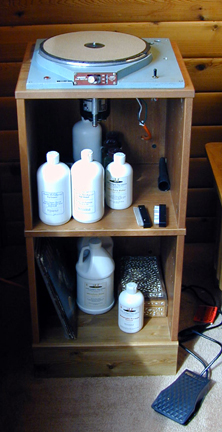
Audiophile and AIVS customer Mark D’Ambrosio decided to address the problem of overheating with the VPI HW-16.5 record cleaning machine by installing a high efficiency, low noise, cooling fan.
Many have noted the problem of high heat generation with their HW-16.5’s when cleaning several records at a sitting. This problem can vary depending on your cleaning method, but there is no doubt that heat can cause damage to the machine and shorten the life of the motors and other parts inside.
Mark started by locating a spot for the fan on the back panel of the HW-16.5 that would facilitate good air flow across both the vacuum and drive motors. Once the spot was located, Mark measured the space that he had to work with and found a suitable fan and shroud at Allied Electronics.
After the cooling fan and shroud arrived, Mark installed it and soon had it working properly. Below is his experience in his own words.
“Upon purchasing my new VPI HW-16.5 record cleaning machine in the fall of 2007, right around the time of the price increase, I had immediately noted upon first use that my 16.5 ran quite warm; even hot. In fact, the machine went into thermal shutdown and took 15 minutes to recover, or cool down, before operation could be resumed.
“After some discussion with Mike at VPI, who was most gracious with his help and advice, suggested that motor break-in would occur and the overheating problem should improve. I explained the cleaning processes I was using, which is the AIVS 3-step process, and sometimes even a 4-step, with two rinse steps.
“I found after this first use, that the HW-16.5 never again went into a thermal shutdown, but the problem with the machine getting very warm or even hot didn’t get any better. Through discussion on many of the audio forums, I had found some others who noted slight dishing-warping of LP's, due to transference of heat from, in my case, an almost-too-hot-to- touch spindle only after 5-6 LPs had been cleaned.
“Mike assured me that the factory warranty would not be voided with installation of a cooling fan, so I set out to acquire the needed parts for this modification.
“I decided to purchase from Allied Electronics, a 4.72" Comair Rotron Whisper Fan, Part # 599-0170, and 120mm Black Plastic Fan Shroud-Cover Part # 599-0405. The electrical specification on the Whisper Fan is 115vac 57cfm@60hz. I believe power consumption of the fan to be 7 watts.
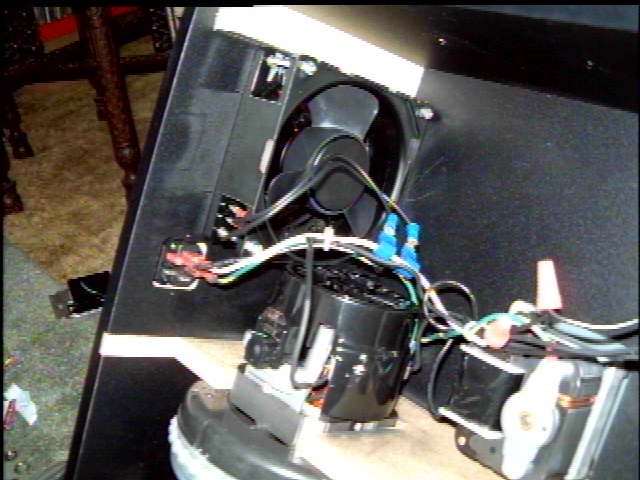
“Installation was pretty straight forward. I looked for the right place within the machine to install the fan, and found the perfect place directly to the rear of both the platter motor, and vacuum motor, where the fan would accomplish drawing heat away from both motors in an efficient manner.
“I first applied masking tape to the outer rear of cabinet, where the fan and shroud would approximately be located. I knew I was going to be later using a sabre saw to cut the hole for fan and shroud on the rear of the cabinet, and the masking tape would protect the laminated cabinet from any scratching or marring.
“After marking two of the fan mounting holes inside the machine and drilling just two of the holes, I was able to then use the shroud as a template on the outside of the cabinet to accurately trace the circular pattern for the large hole that was needed to be cut with the saber saw, as well as mark the remaining screws holes to mount the fan and shroud.
“Cutting the large hole was a simple process using my traced circular pattern which was drawn onto the masking tape protecting the outside of the cabinet surface.
“I cleaned up the hole with a half-round file and a small piece of 150 grit sandpaper. After carefully blowing the dust out of the machine with compressed air, I then masked the cabinet inside and out, and touchup painted the exposed MDF around the hole with semi-gloss black spray paint.
“After drying, it was now time to install the fan and shroud, and wire up the fan.
“Since I don't use my HW-16.5 in a permanent installation, I didn't feel the need to install a separate switch for the fan. Rather, I decided to just hard wire the fan into the pair of incoming AC wires at the female IEC receptacle at rear of the machine.
“Those that prefer using their RCM in a permanent installation, and prefer to keep the RCM always plugged in, should wire in a switch for the fan so that it can be turned off when the machine is not in use.
“The screws needed to button the fan and shroud up to Cabinet were 8-32 x 2" with nylon locking nuts and washers.
“I was now ready to try my modded HW-16.5, so I decided to do a cleaning run.
“The first thing that I discovered after the modification is that this fan model is totally dead silent in operation, so I felt I had made the perfect choice. And with the air exiting out the back of machine, one is not hampered by blowing air during the cleaning process.
“I did not drill or cut any additional venting on the RCM cabinet, and I have found that the three slots on the bottom cover of the HW-16.5 provide adequate through-ventilation. I do not feel a need to install any sort of filters, as I feel it will not be an issue to worry about dust intrusion into machine. I do recommend checking once a year all of components, including wiring and hose fittings. This would be a good time to perhaps blow out the RCM inside with compressed air.
“The results I achieved are a night and day difference. With the fan extracting air as soon as the RCM is plugged in, there's never a chance for heat to build up or accumulate. Gone is the hot spindle, which was almost too hot to the touch before after several records had been cleaned, and along with it any chance of warping or dishing of the records because of the hot spindle. The cabinet itself remains totally cool. I also believe that the machine will benefit from less wear and tear on both motors, and that they will surely last longer now that they have a way of running cooler. The machine could now run 24/7 without any heat build up.”
Mark D’Ambrosio is at it again.
You read here how Mark D’Ambrosio installed a cooling fan on his HW-16.5 record cleaning machine to prevent overheating of the drive motor and the vacuum pump. Now he’s decided to tackle the subject of dirty cork mats and the transference of dirt back onto the clean side of the record.
This is a viable concern; especially when dealing with those rummage sale and resale shop finds that we all make from time to time. Even pre-cleaning the record before placing it on the machine may not be enough, so Marks’ idea was to design and build a platter and mat unit that is easily washable.
Read here, in Mark’s own words, how he completed the project.
“After I had completed my cooling fan modification, I began to think about what other things I could do to improve the VPI HW-16.5.
“The two other issues that I had noted with this machine after buying it, were of course the vacuum motor noise, and my personal dislike of the cork mat on the platter. Having used great care, and common sense when using my machine, I have yet to experience problems such as the cracking of vacuum wands.
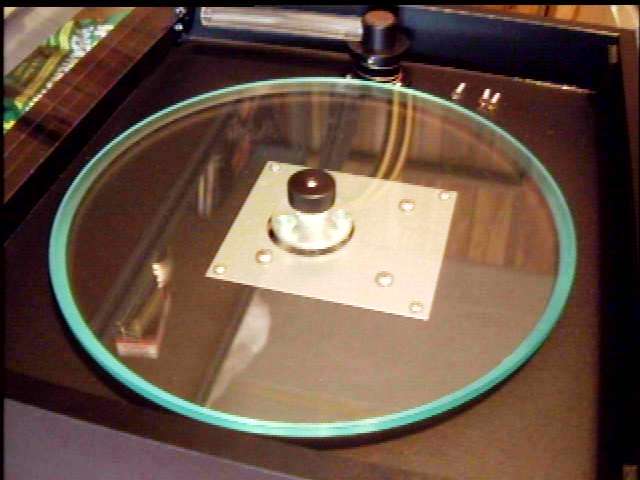
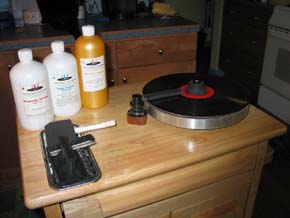
“Since I have access to a friend in the plastics business, and another who is a machinist, I decided to have fabricated a new acrylic platter, replacing the stock MDF platter, and to do away with the cork platter mat as well.
“I wanted a non-porous Mat material that would be easier to clean, and keep clean, and that would also make it easier to identify dust and dirt on the mat. It needed to be a material that would of course be gentle to the record's surface, and also be resistant to the liquids and chemicals encountered during vinyl cleaning. The logical answer pointed to Neoprene sheet for the replacement mat.
“I had also thought for a short period of time that the use of a nude acrylic platter would have some advantages, but I also thought about possible record damage due to a rare chance of record slippage, as well as the possible chance of damage to the underside of the record due to the pressure exerted by the vacuum pump drawing the vacuum wand down upon the record.
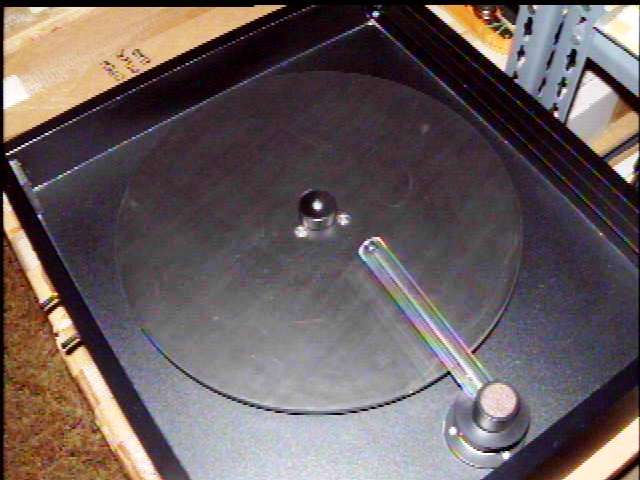
“Having closely examined the VPI HW-16.5 platter, and having spent a time with its use, I recognized that Harry Weisfeld must've given some very careful thought to the particulars of the platter diameter. The fact that the platter is smaller than a 12 inch record evidently permits the record to lie flat, and perhaps by being smaller in diameter than the record, any record cleaning fluids that may possibly flow over to the edge of the record, and consequently onto the underside of it, are not susceptible to travel too far onto the cleaned underside by capillary action. Thus I decided that an exact clone of the original HW-16.5 platter in thickness and diameter was the wisest choice.
“One other minor dislike I noted as I began this project were the three "smallish" 6-32 screws that attach the platter to the motor-platter arbor, so I decided to increase the screw size by re-drilling and re-tapping the arbor, and by replacing the 6-32 screws with 8-32 Phillips flat head machine screws. This gives a stronger attachment of the platter to the arbor.
“The first material I acquired was 1/16 inch thick Neoprene self adhesive backed sheeting, Shore A hardness 40, from McMaster-Carr. My eventual dislike of this material was its surface finish, and its inability to properly bond to the acrylic platter. There was also some very slight bubbling and bumps in the mat that could not be alleviated. This would not have been a problem in use, but I knew there was better material if I could find it.
“I did succeed in finding some better 1/16 inch thick Neoprene sheeting locally, but it was not self adhesive backed. This meant I was going to have to resort to gluing this material onto the acrylic platterl. This particular Neoprene sheeting material possesses a Shore A Hardness of 60 and is smoothly finished; akin to the texture of industrial chemical resistant Neoprene gloves.
“Since I didn't foresee this Neoprene material wearing out anytime soon, the decision to permanently attach with contact cement seemed to be the best way to go. So I purchased a small can of DAP contact cement for the job.
“The last small obstacle that I had to overcome was how to neatly punch the four needed holes in the Neoprene material for spindle hole, and mounting screws.
“An Exacto knife could've been used, but after a little bit of thought, I used an empty .38 caliber revolver cartridge, sharpened it's front edge with fine sandpaper, and constructed a perfectly useable punch for this project with no cost to me.
“To perfectly position the holes on the Neoprene, I applied a light coat of paint around the center of the platter, taking care to avoid the screw and spindle holes, I then used the platter as a sort of blueprint to transfer a guide to the mat. I was then able to precisely position the punch over these untouched areas of the mat.
“I then applied a thin coat of DAP contact cement to both the mat and the platter, and after 25 minutes drying time I was able to affix the mat carefully holding it over the platter and lining up the holes. I succeeded in doing this without leaving any bubbles on the mat.
“After using a small roller to fully bond the Neoprene mat to the acrylic platter, it was then a simple matter to trim away the excess of the 12 inch by 12 inch Neoprene sheet with a utility knife by placing the platter upside down on a clean sheet of plywood, and by using the perimeter of the new acrylic platter as a guide.”
Making your own record cleaning machine is not rocket science. You can see
some photos of homemade RCMs, and to read what the folks who made them have
to say, elsewhere on this page. These homemade RCMs range from pretty basic to fairly sophisticated, but every one of them can be made with rudimentary handy-person skills. With any RCM, you want to (1) rotate the LP, and (2) vacuum up the cleaning fluids.
Rotating the LP.
There are 3 basic approaches here. The first approach is to utilize a lazy susan between a surface and a piece of material cut into a circle 11" to 12" in diameter, which becomes your platter. You can cover the platter with a waterproof or water resistant material, such as cork, cork and rubber auto gasket material, or Sorbothane. To rotate the LP, you can use your finger on the label area, or you can add a spindle, slip a clamp like the KAB record clamp on your spindle, and use the clamp to rotate the LP. You can also use a threaded piece instead of a spindle, and instead of a clamp, you use a piece of material cut into a circle no larger the label area, and insert a rod connector (with threads matching your threaded piece) into the center of this piece. You can cover the bottom of this piece with the same materials mentioned above, and you can then thread your homemade clamp down on the LP.
The second approach is simply to use an inexpensive used turntable for rotating the LP. It doesn’t have to work, so long as the platter spins freely on the bearing. If it’s a belt-drive turntable, remove the belt. Rotate the LP with your finger on the label area or with a clamp like the KAB clamp.
The third approach is to use a turntable which is sufficiently powerful to rotate the LP during the brushing and vacuuming process. Most turntables will be powerful enough to rotate the LP during brushing, but very few if any direct drive or belt drive turntables will be powerful enough to rotate the LP during the vacuuming process. For this you need an idler wheel driven turntable. In the photos section, you will see a few different homemade RCMs using a Russco transcription turntable. This broadcast-intended, idler wheel driven turntable is quite powerful and an excellent choice. Older Rek-O-Cut and Lenco ‘tables will work fine, too. You may wish to cover or glue to the platter a material like one of those mentioned above (i.e., cork, rubber and cork auto gasket material, or Sorbothane) to protect metal platters from cleaning fluids and possible rusting.
Vacuuming the LP.
Here you want a small but powerful vacuum cleaner. A one horsepower Shop-Vac is ideal, but just about any small vacuum with strong suction will work. You can cut a slit into the crevice tool attachment or use the wider “gulper” type attachment. Line the areas where the attachment will contact the LP with the velvet-like material which is sold as replacement “lips” on the Nitty Gritty RCMs. Both Nitty Gritty and Disc Doctor sell this material, and enough to line at least two attachments costs about $15. You can build your vacuum into a piece of furniture; you can stuff it in a box with insulation to quiet it down, and you could even use a whole-house vacuum system because the amount of fluids being vacuumed up is quite small and will evaporate.
|


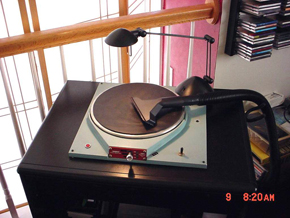
 RCM by Audiogon member Santanaali